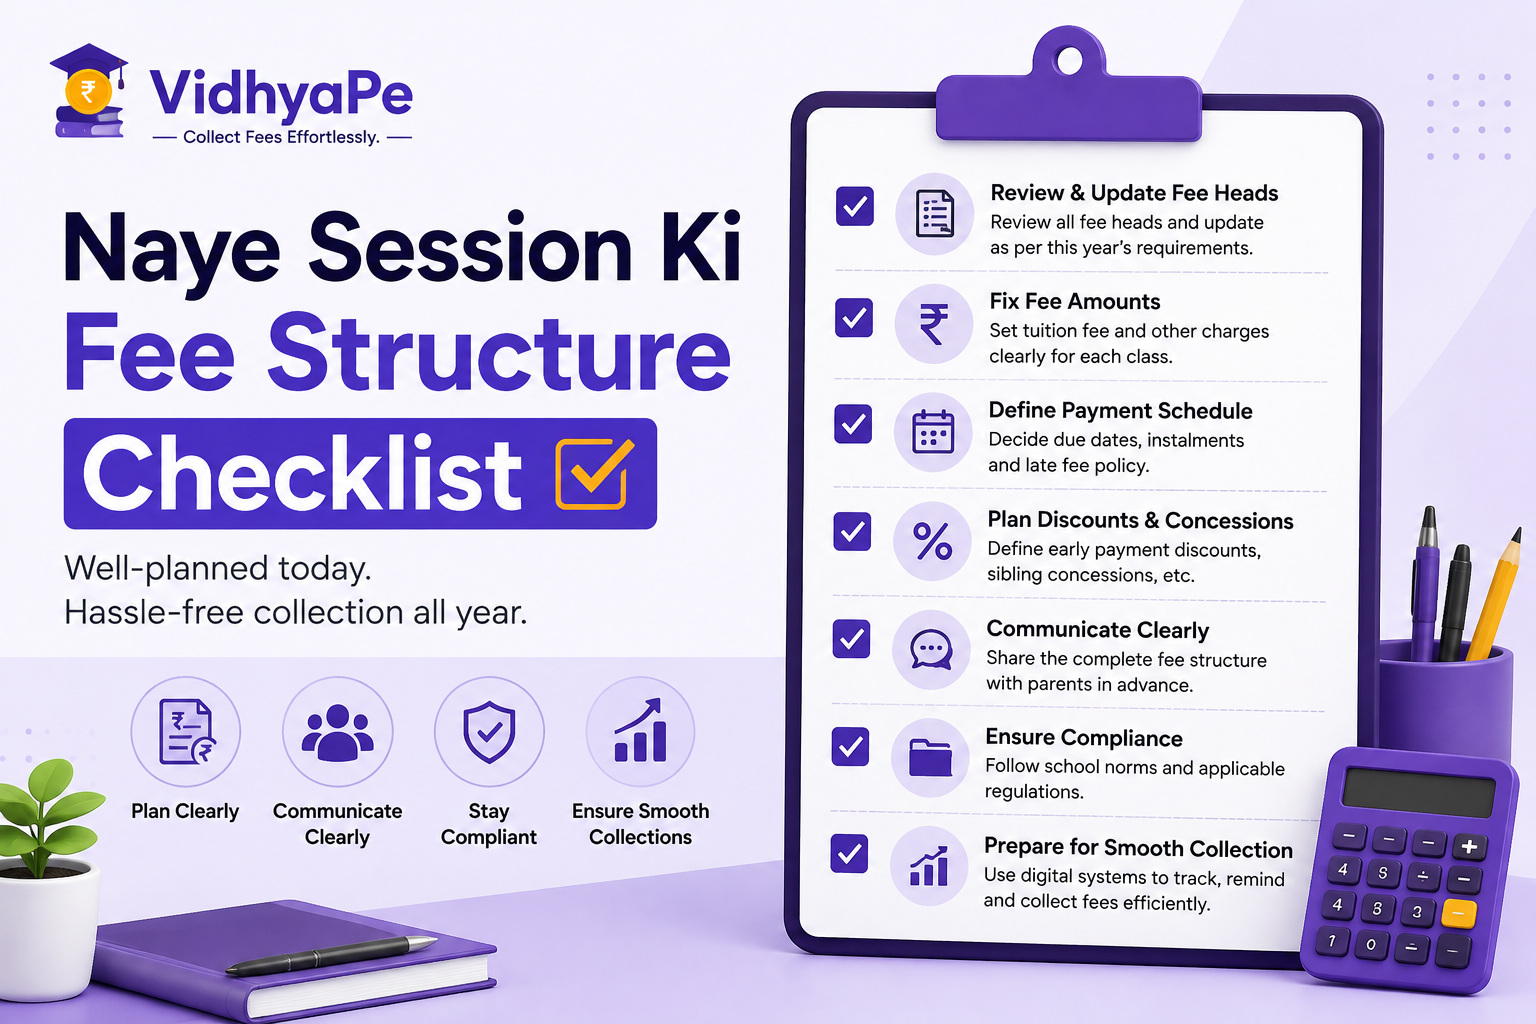
Fee Structure ko properly configure karna.
Agar fee structure setup mein mistake ho gayi, toh iska impact sirf accountant ke kaam par nahi padta.
It can affect:
Student fee demand
Receipts
Outstanding reports
Parent communication
Transport charges
Discounts
School collection reports
Isliye new session start hone se pehle fee structure ko systematically review karna important hai.
1. Academic Session Confirm Karein
Sabse pehle correct academic session create/select karein.
For example:
Academic Session: 2026–27
Check karein:
Session start date
Session end date
Fee collection period
Monthly/quarterly schedule
Purane session ke students aur new session ke students ko clearly separate rakhna important hai.
2. Fee Heads Finalise Karein
School ke saare applicable fee heads ki final list banayein.
Example
Regular Fees
Tuition Fee
Computer Fee
Activity Fee
Annual Fees
Admission Fee
Annual Charges
Examination Fee
Development Charges
Transport
Bus Fee
Route-wise Transport Fee
Jo fee head school collect nahi karta, use unnecessarily create na karein.
Simple fee structure = simpler accounting.
3. Class-Wise Fee Check Karein
Har class ka fee structure same hona zaroori nahi hai.
Example:
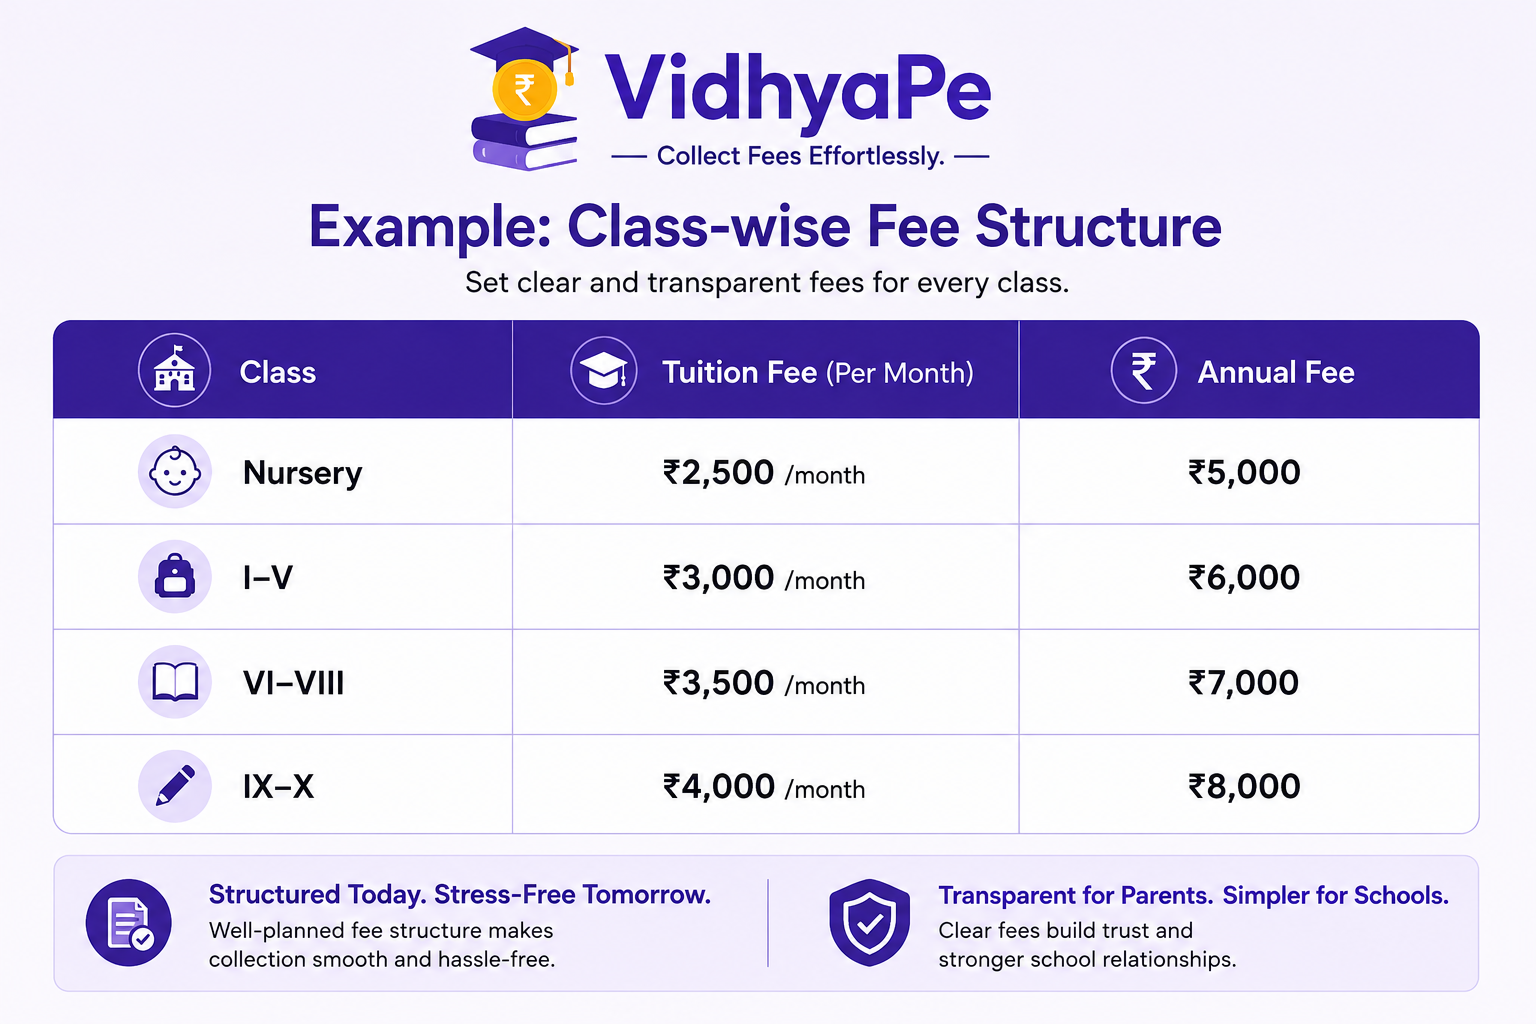
Har class ke liye correct amount verify karein.
Ek class mein ₹3,500 ki jagah ₹35,000 enter ho jaana small data-entry mistake lag sakta hai, lekin hundreds of students ke liye ye major problem ban sakti hai.
4. Monthly Frequency Check Karein
Monthly fee ko correct number of months ke liye configure karein.
For example:
April 2026 → March 2027
Agar school 12 months fee collect karta hai, toh complete session demand verify karein.
Agar kisi particular fee head ki collection frequency different hai, toh usko separately configure karein.
5. Annual Charges Verify Karein
Annual charges ko monthly fees ke saath accidentally duplicate nahi hona chahiye.
Example:
Tuition Fee: ₹3,000 × 12
Annual Charges: ₹6,000
Check karein ki annual charge:
Correct student group par apply ho raha hai
Correct amount hai
Correct billing period mein generate ho raha hai
6. Transport Fee Check Karein
Transport fee mein additional details important hoti hain.
Check:
Transport available hai ya nahi
Route
Monthly charge
Starting month
Student ka pickup/drop route
Transport remove hone par future demand ka behaviour
Example:
Student April se school bus use nahi karta, lekin July se transport start karta hai.
System ko July onward transport demand correctly generate karni chahiye.
7. New Admission Fee Check Karein
New students ke liye admission-related charges separately verify karein.
For example:
Admission Fee: ₹10,000
Tuition Fee: ₹3,500/month
Annual Charges: ₹6,000
Check karein ki admission ke time applicable charges correctly generate ho rahe hain.
8. Discounts & Concessions Test Karein
Fee structure final karne ke baad ek test student par discount/concession check karein.
Example:
Tuition Fee: ₹3,000
Discount: ₹500
Net Payable: ₹2,500
Verify karein ki:
Demand correct hai
Discount correct hai
Outstanding correct hai
Receipt correct amount show karti hai
Discount ko sirf receipt par adjust karna enough nahi hai.
Ledger aur outstanding bhi correct hone chahiye.
9. Advance Fee Collection Test Karein
Kuch parents poore session ki fee advance mein pay karna chahte hain.
Example:
Annual demand:
₹50,000
Parent pays:
₹50,000
System ko student ka outstanding:
₹0
show karna chahiye.
Agar school advance payments accept karta hai, toh new session setup mein is workflow ko test karna important hai.
10. Mid-Session Admission Test Karein
New session start hone ke baad bhi admissions continue ho sakte hain.
Example:
Student joins in July.
Check karein:
July se applicable fee generate ho
Earlier months unnecessarily charge na hon
Admission charges correctly apply hon
Transport starting month correctly calculate ho
11. Sample Students Par Testing Karein
Live collection start karne se pehle kam se kam kuch test cases run karein.
Test Student 1
Existing student + regular fee
Test Student 2
New admission + admission fee
Test Student 3
Transport student
Test Student 4
Discount/concession student
Test Student 5
Advance payment student
Test Student 6
Mid-session admission
Har test mein check karein:
Demand → Payment → Receipt → Outstanding
12. Final Pre-Session Checklist
Before opening fee collection for the new session:
Correct academic session created
All fee heads reviewed
Class-wise fees verified
Monthly frequency verified
Annual charges checked
Transport charges verified
New admission charges tested
Discounts/concessions tested
Advance payment tested
Mid-session admission tested
Sample receipts checked
Outstanding calculations verified
Accountant trained
Final fee structure approved by school management
One Golden Rule
Never start the new session's fee collection before testing the complete fee cycle.
Test:
Demand → Collection → Receipt → Ledger → Outstanding
A fee structure can look correct on paper and still produce incorrect demands once real students and payments enter the system.
Spend a few hours testing before the session starts.
It can save the accounts team days of corrections later.
VidhyaPe Ke Saath New Session Ready Karein
VidhyaPe ka focus school fee collection ko simple aur organised banana hai.
New session setup ke time school apne fee structure, student demands, payments, receipts aur outstanding ko ek structured workflow mein manage kar sakta hai.